Apple has just released Watch OS 1.0.1, which includes number of performance improvements and bug fixes.
Since this is the first software update for Apple Watch, here’s a quick guide on how to install the update on your Apple Watch.
To install the update, you need to make sure your Apple Watch is in
the range of your iPhone, connected to the charger and charged at least
50%. Please note that the installation process could take 20-30 minutes.
Launch the Apple Watch companion app on your iPhone.
Tap on General.
Then tap on Software Update.
Tap on Download and Install.
You will be prompted to enter your iPhone’s password. Enter it and tap on Done to continue.
Then tap on Agree, to agree to the terms and conditions of the update.
It should start downloading the update to your Apple Watch. The
update is 51.5MB in size for the 38mm model. It could take 10-15 minutes
to download the update.
After the update has been successfully downloaded, it will inform you that it is “Preparing” for the update.
Before it can start the installation process, it will check whether
the Apple Watch is connected to its charger and charged at least 50%. It
will pause the installation. Tap on Ok after the conditions have been
met, and to proceed with the installation process.
At this point the installation process switches to the
Apple Watch. The Apple Watch companion app will inform you that the
update is being installed on the Apple Watch.
When the installation on the Apple Watch starts it will restart the
Apple Watch, and display the progress of the installation process. This
is the updating screen on the Apple Watch.
Your Apple Watch may reboot couple of times during the installation
process. After the installation is complete, it will reboot your Apple
Watch.
Alternatively, you can also check our video walkthrough:
That’s it, your Apple Watch should be updated with Watch OS 1.0.1. Let me know how it goes in the comments.
As expected, the TaiG team has released a new version of their jailbreak tool for Windows to jailbreak iOS 8.2 beta 1 and beta 2. Update: This method no longer works, check the update below for more details.
As I reported last night, PPJailbreak allows you to jailbreak iOS 8.2 beta 2, so you can install iOS 8.2 beta 2 on your device and then use the PPJailbreak to jailbreak your device.
But PP jailbreak was only available for Mac users. So TaiG team have
now released TaiG 1.3.0 to jailbreak iOS 8.2 beta 1 and beta 2, so it
allows Windows users to also use this workaround.
But as mentioned in the PP jailbreak article, the catch here is that, the latest beta version available is iOS 8.2 beta 5,
so iOS 8.2 beta 2 is not currently available in the Member Center on
Apple’s Developer website even if you’re a developer. The download links to iOS 8.2 beta 2 and iOS 8.2 beta 1 are also not working. So you will have to search on google to download the firmware file.
The other interesting thing about iOS 8.2 beta 2 is that it does not have an expiration date (via iH8sn0w),
which is usually not the case with most beta versions. So if you can
get hold of the iOS 8.2 beta 2 firmware file for your device, then it
would mean that you will be able to jailbreak your device on iOS 8
forever, and don’t have to worry about losing the jailbreak.
It is also important to note here that tweaks may not be compatible with iOS 8.2 yet, so you may have to wait for sometime to be able to install your favorite tweaks from Cydia.
iOS 8.2 beta 2 is compatible with the following devices:
iPad Air 2, iPad mini 3, iPad Air, iPad 4, iPad 3 and iPad 2
iPad mini 1 (1st generation iPad mini), iPad mini 2 (Retina iPad mini), iPad mini 3
iPod touch 5th generation
So assuming you’ve managed to install iOS 8.2 beta 1 or iOS 8.2 beta 2
on your device then follow these instructions to jailbreak your device: Important points before we proceed:
TaiG jailbreak is available for Windows. Mac users can use PP jailbreak.
The jailbreak is an untethered jailbreak.
It does not jailbreak iOS 8.2 beta 3, iOS 8.2 beta 4 or iOS 8.2 beta 5.
Use iCloud or iTunes to back up any and all personal information
that you need to keep safe. The jailbreak has been reported to be
working in most cases, but on the off chance something goes wrong, it’s a
good idea to have an escape plan.
Disable any Anti-virus programs or firewalls temporarily that could prevent TaiG Jailbreak from connecting to the internet.
If you’re on iOS 8.1.2, then it is recommended to stay at iOS 8.1.2
rather than upgrading to iOS 8.2 beta 2, as a number of tweaks are not
compatible with iOS 8.2 yet.
If you’re on iOS 8.1.2 and not yet jailbroken your device, then you
can follow our guides to jailbreak your device using TaiG jailbreak for
Windows or PPJailbreak for Mac.
Step 1: Download the latest version of TaiG jailbreak from this link on your computer, and unzip the zip file. Step 2: Connect your device to your computer using the USB cable. Step 3: Disable Passcode from Settings > Touch ID & Passcode. Step 4: Also turn off Find my iPhone from Settings > iCloud > Find my iPhone. Step 5: Please launch the application as an Administrator. Right click on the TaiG exe and select the “Run as Administrator” option. Step 6: TaiG will take some time to detect your
device. Once you confirm that it is showing the correct firmware
version, deselect the TaiG App Store (the one in Chinese), just below
Cydia 1.1.16. Step 7: Click on the green jailbreak (Begin or Start) button to proceed. You will see the circular progress bar. Note: If TaiG gets stuck at 30% or so then don’t
worry, wait for 20-30 minutes for the process to progress, it can take
time if you’re using it in a virtual machine. Check this post for more details. Step 8: After the jailbreak is complete, your device
will reboot automatically, and you should should see the Cydia icon on
the Home screen.
Please don’t forget to re-enable the passcode and Find My iPhone feature after successfully jailbreaking your device.
After the jailbreaking process is complete, do not forget to checkout our article to change the root password.
➤ How to change the root password on your jailbroken iPhone or iPad
It remains to be seen if the TaiG and PPJailbreak team will be able
to release a jailbreak for iOS 8.2 when it is released to the public.
They haven’t said anything about the progress they’re making on that
front.
Let us know how it goes in the comments below.
How To Bypass iOS 8 iCloud Activation Lock Screen on 8.1.3
In an unexpected turn of events, an iOS 8 activation lock bypass has
emerged. You can now bypass iOS 8 activation lock using a custom DNS
server and some glitches. This is not a forever solution but can allow
access into the device to achieve the previous owners email for
contacting purposes. This will also allow you to make use of the
activation locked device and bypass the iOS 8 activation lock and watch
movies, youtube or play games. There are many functions to explore with
thus bypass method.
This method has been tested with the iPhone 5S, 5 and 4S by me
personally all on the latest iOS 8.1.3 firmware. This does also work on
the latest iPhone, iPad and iPod Touch 5G models.
Step 1.The custom DNS server you need to enter is: 78.109.17.60
Step 2. Go to the last activation screen and select ‘Activation
Help’, this will boot you over to the custom website. Here you can play
games, watch youtube and so much more. If you wish to permanently bypass
iOS 8 activation lock, read on below.
Step 3. Go to ‘Applications’ and select ‘Crash Test 1′. This will respring your device.
Step 4. Navigate to WiFi settings once again, click on the ‘i’ and select ‘Manual’ on the ‘HTTP Proxy’ area.
Step 5. Add 30 random emoji icons to the ‘Server’ option and type ‘8888’ in the ‘Port’ option.
Step 6. Click back and then next. As shown in the video above,
proceed to slide to unlock and click the language options for a solid
2-3 minutes to finally be booted to the homescreen.
Step 7. Once on the homescreen you can open 3 applications, Phone,
Newsstand and Facetime. Note you need to force restart by holding Power +
Home every time you open an app to restart your device and the bypass
iOS 8 activation lock process.
Step 8. Open the Facetime application and here you can find the email
of the previous owner to which you can email and ask that your device
be taken off their iCloud account. If you can’t find the email here,
restart this process and open the Phone application to see the owners
phone number.
Hope this helps you with your activation locked device!
How to remove or bypass iCloud lock on your iPhone? Well, If you’ve
gone down the often hazardous route of purchasing a relatively new but
second-hand iOS device (iPhone, iPod touch or iPad), then there is
potential for you to suffer from an iCloud related nightmare. Apple’s
recent introduction of security features mean that if a device has been
locked using the original owner’s iCloud account, then anyone purchasing
that device to restore or use will actually require that master iCloud
password to bypass the lock. Brilliant for those who have suffered a
loss or theft, but terrible for those genuine buyers who fall victim to a
locked device.
As is usually the case with these things, there was a proven method
of bypassing this iCloud Activation Lock, but it came with a whole heap
of problems attached to it, namely being entirely unreliable due to the
provider’s servers always being offline and unreachable by the service.
Not exactly ideal. Thankfully, there is a new service that can pretty
much offer the same results, albeit with a few caveats that could put
some potential users off.
Tell Me About iCloud Activation Lock Removal Service:
A test-proven service that bypasses the iPhone iCloud Activation
Lock. Basically, if a previous owners iCloud credentials are proving to
be a show-stopper, then worry no more.
5-15 day turnaround time.
iCloud Activation Lock removal service will NOT work on devices that
are reported as lost or stolen. This is a protection mechanism to
ensure that stolen devices remain out of service.
iCloud Activation Lock removal service, will NOT perform a factory
unlock on the device. Yes, it will remove iCloud activation locks, but
it will not allow a previously locked device to be used with any SIM
card.
iCloud Lock Removal Service – Supported Devices:
iPhone 5S
iPhone 5C
iPhone 5
iPhone 4S
iPhone 4
Step-by-Step Guide to Bypass iCloud Activation Lock:
Step 1: Head on over to the official website for the iCloud Activation Lock Removal service. Step 2: Locate the IMEI number for the iOS device in question. If you don’t know how to obtain the IMEI number, you can head over this link. Then Enter the IMEI number into the form and send. Step 3: When the iPhone iCloud removal service completed, a confirmation email will be received with the title “Activation Lock Removed“. Step 4: The device is now ready. A new iCloud
account can be added to the device in question and Find My iPhone will
have been disabled on the hardware.
100% satisfaction guarantee is part of our commitment to our customers.
The iCloud Remover Service
removes the lock for an iCloud account bypassing the need to enter an
iCloud username and password when you either forget or don't have the
iCloud log-in details.Enables you to activate an iPhone where you have
forgotten the passwor.If your iPhone is stuck on the screen as per the
image below - you need this service.Works with all devices
It bypass icloud activation and
the need to enter an iCloud username and password when you either
forget or don't have the iCloud log-in details. Is the simplest iCloud
Activation Lock Removal Ever for iPhone 6, iPhone 6+ , iPhone 5S, iPhone
5, iPhone 5C, iPhone 4S, iPhone 4 and iPad Air/Mini 4,3,2.
We offer an official factory IMEI iCloud Remove Service. An official
IMEI Remover is the only genuine service. Our service effectively
bypasses the iCloud Activation and the whole process is completed
online, without having to send us your phone to us or leave it with a
shop.
અમરનાથ યાત્રા એ આખાયે ભારતવર્ષમા કૈલાશ યાત્રા પછીની મોટી યાત્રા ગણાય છે.
અમારા અહોભાગ્ય કે અમોને આ યાત્રા કરવા મળી, અહી લેખકે હિમાલય પ્રત્યેની
જે પોતાની લાગણીઓ છે તે સહજ ભાવે રજુ કરી છે. આશા છે કે અમરનાથ યાત્રા એ
જતા શ્રધાળુઓને આ પુસ્તક એક ભોમીયો બની રહેશે...
એક શિક્ષક તરીકે જીગર રત્નોત્તર હરવા ફરવાનો શોખ પણ ધરાવે છે. વાંચનનો એમનો
શોખ એમને હવે લેખનકાર્ય તરફ લઈ જઈ રહ્યો છે. આશા રાખુ છુ કે આવનારા સમયમા
લોકોની પુસ્તકો પ્રત્યેની લાગણીને હુ મારા લેખનકાર્યથી ખુશ કરી શકુ.
Yu Yureka can now be updated with the latest version of custom Lollipop
update, thanks to the release of Android 5.1 based CyanogenMod 12.1 ROM
from the industrious XDA Developer, varun.chitre15.
The new CM12.1 ROM follows the recent release of Cyanogen OS 12S update (click
link to see tutorial) for the flagship handset and it is mandatory to
ensure that your smartphone is already running the Cyanogen OS 12S
update, before you start flashing the CM12.1 ROM on the handset. Android 5.1 CyanogenMod 12.1 ROM hits Micromax Yu Yureka: How to installXDA Developers
Interested users may browse for the original CyanogenMod source code via github and also find the necessary Yu Yureka kernel source code for CM12 ROM here.
The Android 5.1 CyanogenMod 12.1 ROM can be installed either via TWRP
or ClockworkMod (CWM) recovery, using the step-by-step guide posted
below. XDA DevelopersIBTimes UK reminds readers it will not be held
liable for any damage to device during or after the Android 5.1 Lollipop
firmware installation. Users are advised to proceed at their own risk. Pre-requisites
The instructions given in this guide are meant for the European variant of MicromaxYu Yureka only. Verify device model number by navigating to Settings > About Phone.
Ensure the phone has at least 80% battery charge to prevent unexpected device shutdown (due to battery drain) while installing the ROM.
Back up data and settings using a recommended
custom recovery tool, like ClockworkMod (CWM) or TWRP, as it creates a
complete image of the existing phone setup. In Recovery, choose Backup
and Restore and tap Backup.
Enable USB Debugging mode via Settings > Developer Options (if
running Android 4.0 or above) or Settings > Applications
> Development (if running Android 2.3 or earlier).
Ensure that the device is rooted with CWM recovery installed and its bootloader is unlocked.
Downloads Required Android 5.1 CyanogenMod 12.1 ROM for Micromax Yu Yureka Google Apps Steps to Install Android 5.1 Lollipop on Micromax Yu Yureka via CyanogenMod 12.1 ROM Step 1 - Download Android 5.1 CyanogenMod 12.1 custom ROM for OnePlus One on the computer. Step 2 - Connect and mount the phone's USB mass storage on computer with USB cable. Step 3 - Now, copy the downloaded CM12.1 ROM zip file to the root folder on the phone's SD card. Step 4 - Power off the phone and disconnect its USB cable from computer. Step 5 - Boot the device into Recovery Mode by pressing and holding Volume Up, Volume Down and Power buttons together for around 7 to 8 seconds. Step 6 - Once the phone enters CWM Recovery, perform a full data wipe task by clicking Wipe Data/Factory Reset. Use the Volume keys to navigate between options and Power button to select an option in the Recovery Mode. Step 7 - Perform Wipe Cache Partition and wait until the process completes. Step 8 - Perform Wipe Dalvik Cache as well. To do this, go to 'advanced' option and then click Wipe Dalvik Cache. This will help in preventing boot loop issues or any boot ROM related errors during firmware installation. Step 9 - Then return to the main recovery menu and choose Install Zip from SD card. Step 10 - Click Choose Zip from SD card. Use volume keys to navigate to the CM12.1 ROM zip file that you copied earlier to your phone's SD card and choose it by tapping the Power button. Confirm the ROM installation on next screen and the installation process will begin. Note: Repeat Step 9 and Step 10 to install Google Apps (Gapps) as well. Step 11 - Once the ROM and Gapps installation completes, go to "+++++Go Back+++++" and select Reboot System Now in the Recovery menu.
The phone will now reboot and the first boot may take about five minutes to complete. So, please be patient.
Your Yu Yureka is now running the latest Android 5.1 Lollipop via
CyanogenMod 12.1 custom ROM. Go to Settings > About phone to verify
the firmware version installed.
How to Download and Manually Install Android 5.0 Lollipop on Android Devices
1. Download and install the latest Android SDK
on your Windows computer. This installs two programs, ADB, and
Fastboot, which can be accessed through the command terminal on your PC,
as a part of the software development kit.
2. Add the SDK folder to the PATH by following these steps:
Right click My Computer and click on Properties.
Click on Advanced System Settings.
Click on System Properties > Advanced > Environment Variables.
In the Window, select Path, then click on Edit,
and then type in the name of the directory where you installed the SDK,
and remember that each entry is separated by a semi-colon.
3. Enable USB debugging on your device. First, go to Settings > About Phone > Software information.
4. Tap Build number seven times.
5. Go to Settings > Developer options. Tick USB debugging.
6. Download the correct factory image for your device.
7. Extract the image on your computer.
8. Connect your device to your computer over USB.
9. Start the device in fastboot mode.
The
easiest way to do this is to hold a key combination while powering up
the device. For Nexus 5, hold the volume up, volume down and power
buttons while powering on the device. The full list of key combinations
for different devices is here.
You
can also boot into fastboot mode using the ADB tool: With the device
powered on, go to the command terminal and execute the following: adb reboot bootloader
If needed, unlock the device's bootloader through your computer using the command terminal and executing: fastboot oem unlock
1. Open a command terminal and navigate to the unzipped system image directory.
2. Execute flash-all.bat,
which was a part of the unzipped image file. This script installs the
necessary bootloader, baseband firmware(s), and operating system. For
this to work, you need to have added the folder where ADB and Fastboot
are installed to the system's path as described in step 2.
3. When
this is done, Google recommends that you lock the bootloader for
security. You can do that by booting the device in fastboot mode while
still connected via USB, and using the command terminal to execute: fastboot oem lock.
That's
how you can install Android 5.0 Lollipop on your Nexus device. We still
recommend that you just wait a while until the OTA update arrives on
your device.
Important: Be warned that there is a WhatsApp calling scam doing the rounds. Read up, be wary and spread the word.
The latest version of WhatsApp, v2.12.19 is the one you've been
waiting for: it does not require someone with WhatsApp call feature
already activated to call you. All you need to do is hit up the WhatsApp website and download v2.12.19.
You will need to have Unknown Sources enabled in your device's
security settings first though (don't forget to turn Unknown Sources off
again afterwards), but then all you do is install the downloaded app
and you'll see the three tab view below with the ability to make and
receive WhatsApp calls.
Enable Unknown Sources in your Security settings. On stock Android, you'll find this option at Settings > Security > Unknown sources
Get someone who already has the WhatsApp voice calling feature enabled to call you.
Once you answer the call, three tabs will appear at the top of your
WhatsApp interface - calls, chats and contacts. This means voice
calling has been enabled.
The calls tab will show you a detailed call log and in any chat with a
WhatsApp contact you'll find that the dialer icon at the top now makes
calls direct via WhatsApp and not the regular dialer. We've tested the
latest version with several phones and they all worked first try, so it
looks like the wait is finally over and WhatsApp voice calls are here
for everyone.
Have you got the WhatsApp feature feature yet? Will you now turn to WhatsApp as your default
In relational database systems (DBS) data are represented using tables (relations). A query issued against the DBS also results in a table. A table has the following structure:
Column 1 Column 2 ... Column n
←− Tuple (or Record)
... ... ... ...
A table is uniquely identified by its name and consists of rows that contain the stored informa- tion, each row containing exactly one tuple (or record). A table can have one or more columns. A column is made up of a column name and a data type, and it describes an attribute of the tuples. The structure of a table, also called relation schema, thus is defined by its attributes. The type of information to be stored in a table is defined by the data types of the attributes at table creation time.
SQL uses the terms table, row, andcolumn for relation, tuple, andattribute, respectively. In this tutorial we will use the terms interchangeably.
A table can have up to 254 columns which may have different or same data types and sets of values (domains), respectively. Possible domains are alphanumeric data (strings), numbers and date formats. Oracle offers the following basic data types:
• char(n): Fixed-length character data (string), n characters long. The maximum size for n is 255 bytes (2000 in Oracle8). Note that a string of type char is always padded on right with blanks to full length of n.(☞ can be memory consuming). Example: char(40) • varchar2(n): Variable-length character string. The maximum size for n is 2000 (4000 in Oracle8). Only the bytes used for a string require storage. Example: varchar2(80) • number(o,d): Numeric data type for integers and reals. o = overall number of digits, d = number of digits to the right of the decimal point. Maximum values: o =38, d= −84 to +127. Examples: number(8), number(5,2) Note that, e.g., number(5,2) cannot contain anything larger than 999.99 without result- ing in an error. Data types derived from number are int[eger], dec[imal], smallint and real. • date: Date data type for storing date and time. The default format for a date is: DD-MMM-YY. Examples: ’13-OCT-94’, ’07-JAN-98’
1
• long: Character data up to a length of 2GB. Only one long column is allowed per table.
Note: In Oracle-SQL there is no data typeboolean. It can, however, be simulated by using either char(1) or number(1).
As long as no constraint restricts the possible values of an attribute, it may have the special value null (for unknown). This value is different from the number 0, and it is also different from the empty string ’’.
Further properties of tables are:
• the order in which tuples appear in a table is not relevant (unless a query requires an explicit sorting). • a table has no duplicate tuples (depending on the query, however, duplicate tuples can appear in the query result).
A database schema is a set of relation schemas. The extension of a database schema at database run-time is called a database instance or database, for short.
1.1.1 Example Database
In the following discussions and examples we use an example database to manage information about employees, departments and salary scales. The corresponding tables can be created under the UNIX shell using the command demobld. The tables can be dropped by issuing the command demodrop under the UNIX shell.
The table EMP is used to store information about employees:
Each row (tuple) from the table is interpreted as follows: an employee has a number, a name, a job title and a salary. Furthermore, for each employee the number of his/her manager, the date he/she was hired, and the number of the department where he/she is working are stored.
2
The table DEPT stores information about departments (number, name, and location):
DEPTNO DNAME LOC 10 STORE CHICAGO 20 RESEARCH DALLAS 30 SALES NEW YORK 40 MARKETING BOSTON
Finally, the table SALGRADE contains all information about the salary scales, more precisely, the maximum and minimum salary of each scale.
In order to retrieve the information stored in the database, the SQL query language is used. In the following we restrict our attention to simple SQL queries and defer the discussion of more complex queries to Section 1.5
In SQL a query has the following (simplified) form (components in brackets [ ] are optional):
select [distinct] <column(s)> from <table> [ where <condition> ] [ order by <column(s) [asc|desc]> ]
1.2.1 Selecting Columns
The columns to be selected from a table are specified after the keyword select. This operation is also called projection. For example, the query
select LOC, DEPTNO from DEPT;
lists only the number and the location for each tuple from the relation DEPT. If all columns should be selected, the asterisk symbol “∗” can be used to denote all attributes. The query select ∗ from EMP; retrieves all tuples with all columns from the table EMP. Instead of an attribute name, the select clause may also contain arithmetic expressions involving arithmetic operators etc. select ENAME, DEPTNO, SAL ∗ 1.55 from EMP;
3
For the different data types supported in Oracle, several operators and functions are provided: • for numbers: abs, cos, sin, exp, log, power, mod, sqrt,+ ,−,∗,/,... • for strings: chr, concat(string1, string2), lower, upper, replace(string, search string, replacement string), translate, substr(string, m, n), length, to date,... • for the date data type: add month, month between, next day, to char,...
The usage of these operations is described in detail in the SQL*Plus help system (see also Section 2).
Consider the query
select DEPTNO from EMP;
which retrieves the department number for each tuple. Typically, some numbers will appear more than only once in the query result, that is, duplicate result tuples are not automatically eliminated. Inserting the keyword distinct after the keyword select, however, forces the elimination of duplicates from the query result.
It is also possible to specify a sorting order in which the result tuples of a query are displayed. For this the order by clause is used and which has one or more attributes listed in the select clause as parameter. desc specifies a descending order and asc specifies an ascending order (this is also the default order). For example, the query
select ENAME, DEPTNO, HIREDATE from EMP; from EMP order by DEPTNO [asc], HIREDATE desc;
displays the result in an ascending order by the attribute DEPTNO. If two tuples have the same attribute value for DEPTNO, the sorting criteria is a descending order by the attribute values of HIREDATE. For the above query, we would get the following output:
ENAME DEPTNO HIREDATE FORD 10 03-DEC-81 SMITH 20 17-DEC-80 BLAKE 30 01-MAY-81 WARD 30 22-FEB-81 ALLEN 30 20-FEB-81 ...........................
1.2.2 Selection of Tuples
Up to now we have only focused on selecting (some) attributes of all tuples from a table. If one is interested in tuples that satisfy certain conditions, the where clause is used. In a where clause simple conditions based on comparison operators can be combined using the logical connectives and, or, andnot to form complex conditions. Conditions may also include pattern matching operations and even subqueries (Section 1.5).
4
Example: List the job title and the salary of those employees whose manager has the number 7698 or 7566 and who earn more than 1500: select JOB, SAL from EMP where (MGR = 7698 or MGR = 7566) and SAL > 1500;
For all data types, the comparison operators =,!= or <>,<, >,<=, => are allowed in the conditions of a where clause.
Further comparison operators are: • Set Conditions: <column> [not] in (<list of values>) Example: select ∗ from DEPT where DEPTNO in (20,30); • Null value: <column> is [not] null, i.e., for a tuple to be selected there must (not) exist a defined value for this column. Example: select ∗ from EMP where MGR is not null; Note: the operations = null and ! = null are not defined! • Domain conditions: <column> [not] between <lower bound> and <upper bound> Example: • select EMPNO, ENAME, SAL from EMP where SAL between 1500 and 2500; • select ENAME from EMP where HIREDATE between ’02-APR-81’ and ’08-SEP-81’;
1.2.3 String Operations
In order to compare an attribute with a string, it is required to surround the string by apos- trophes, e.g., where LOCATION = ’DALLAS’. A powerful operator for pattern matching is the like operator. Together with this operator, two special characters are used: the percent sign % (also called wild card), and the underline , also called position marker. For example, if one is interested in all tuples of the table DEPT that contain two C in the name of the depart- ment, the condition would be where DNAME like ’%C%C%’. The percent sign means that any (sub)string is allowed there, even the empty string. In contrast, the underline stands for exactly one character. Thus the condition where DNAME like ’%C C%’ would require that exactly one character appears between the two Cs. To test for inequality, the not clause is used.
Further string operations are: • upper(<string>) takes a string and converts any letters in it to uppercase, e.g., DNAME = upper(DNAME)(The name of a department must consist only of upper case letters.) • lower(<string>) converts any letter to lowercase, • initcap(<string>) converts the initial letter of every word in <string> to uppercase. • length(<string>) returns the length of the string. • substr(<string>, n [, m]) clips out a m character piece of <string>, starting at position n. Ifm is not specified, the end of the string is assumed. substr(’DATABASE SYSTEMS’, 10, 7) returns the string ’SYSTEMS’.
5
1.2.4 Aggregate Functions
Aggregate functions are statistical functions such as count, min, max etc. They are used to compute a single value from a set of attribute values of a column:
count Counting Rows Example: How many tuples are stored in the relation EMP? select count(∗) from EMP; Example: How many different job titles are stored in the relation EMP? select count(distinct JOB) from EMP; max Maximum value for a column min Minimum value for a column Example: List the minimum and maximum salary. select min(SAL), max(SAL) from EMP; Example: Compute the difference between the minimum and maximum salary. select max(SAL)-min(SAL) from EMP; sum Computes the sum of values (only applicable to the data type number) Example: Sum of all salaries of employees working in the department 30. select sum(SAL) from EMP where DEPTNO = 30; avg Computes average value for a column (only applicable to the data type number)
Note: avg, min and max ignore tuples that have a null value for the specified attribute, but count considers null values.
1.3 Data Definition in SQL
1.3.1 Creating Tables
The SQL command for creating an empty table has the following form:
For each column, a name and a data type must be specified and the column name must be unique within the table definition. Column definitions are separated by colons. There is no difference between names in lower case letters and names in upper case letters. In fact, the only place where upper and lower case letters matter are strings comparisons. A not null
6
constraint is directly specified after the data type of the column and the constraint requires defined attribute values for that column, different from null.
The keyword unique specifies that no two tuples can have the same attribute value for this column. Unless the condition not null is also specified for this column, the attribute value null is allowed and two tuples having the attribute value null for this column do not violate the constraint.
Example: The create table statement for our EMP table has the form create table EMP ( EMPNO number(4) not null, ENAME varchar2(30) not null, JOB varchar2(10), MGR number(4), HIREDATE date, SAL number(7,2), DEPTNO number(2) ); Remark: Except for the columns EMPNO and ENAME null values are allowed.
1.3.2 Constraints
The definition of a table may include the specification of integrity constraints. Basically two types of constraints are provided: column constraints are associated with a single column whereas table constraints are typically associated with more than one column. However, any column constraint can also be formulated as a table constraint. In this section we consider only very simple constraints. More complex constraints will be discussed in Section 5.1.
The specification of a (simple) constraint has the following form: [constraint <name>] primary key | unique | not null A constraint can be named. It is advisable to name a constraint in order to get more meaningful information when this constraint is violated due to, e.g., an insertion of a tuple that violates the constraint. If no name is specified for the constraint, Oracle automatically generates a name of the pattern SYS C<number>.
The two most simple types of constraints have already been discussed: not null and unique. Probably the most important type of integrity constraints in a database are primary key con- straints. A primary key constraint enables a unique identification of each tuple in a table. Based on a primary key, the database system ensures that no duplicates appear in a table. For example, for our EMP table, the specification
defines the attribute EMPNO as the primary key for the table. Each value for the attribute EMPNO thus must appear only once in the table EMP. A table, of course, may only have one primary key. Note that in contrast to a unique constraint, null values are not allowed.
Example: We want to create a table called PROJECT to store information about projects. For each project, we want to store the number and the name of the project, the employee number of the project’s manager, the budget and the number of persons working on the project, and the start date and end date of the project. Furthermore, we have the following conditions: - a project is identified by its project number, - the name of a project must be unique, - the manager and the budget must be defined.
A unique constraint can include more than one attribute. In this case the pattern unique(<column i>,...,<column j>) is used. If it is required, for example, that no two projects have the same start and end date, we have to add the table constraint
constraint no same dates unique(PEND, PSTART)
This constraint has to be defined in the create table command after both columns PEND and PSTART have been defined. A primary key constraint that includes more than only one column can be specified in an analogous way.
Instead of a not null constraint it is sometimes useful to specify a default value for an attribute if no value is given, e.g., when a tuple is inserted. For this, we use the default clause.
Example: If no start date is given when inserting a tuple into the table PROJECT, the project start date should be set to January 1st, 1995:
PSTART date default(’01-JAN-95’)
Note: Unlike integrity constraints, it is not possible to specify a name for a default.
8
1.3.3 Checklist for Creating Tables
The following provides a small checklist for the issues that need to be considered before creating a table. • What are the attributes of the tuples to be stored? What are the data types of the attributes? Should varchar2 be used instead of char ? • Which columns build the primary key? • Which columns do (not) allow null values? Which columns do (not) allow duplicates ? • Are there default values for certain columns that allow null values ?
1.4 Data Modifications in SQL
After a table has been created using the create table command, tuples can be inserted into the table, or tuples can be deleted or modified.
1.4.1 Insertions
The most simple way to insert a tuple into a table is to use the insert statement insert into <table> [(<column i, ..., column j>)] values (<value i, ..., value j>);
For each of the listed columns, a corresponding (matching) value must be specified. Thus an insertion does not necessarily have to follow the order of the attributes as specified in the create table statement. If a column is omitted, the value null is inserted instead. If no column list is given, however, for each column as defined in the create table statement a value must be given.
insert into PROJECT values(313, ’DBS’, 7411, null, 150000.42, ’10-OCT-94’, null);
If there are already some data in other tables, these data can be used for insertions into a new table. For this, we write a query whose result is a set of tuples to be inserted. Such an insert statement has the form insert into <table> [(<column i, ..., column j>)] <query>
Example: Suppose we have defined the following table:
9
create table OLDEMP ( ENO number(4) not null, HDATE date); We now can use the table EMP to insert tuples into this new relation: insert into OLDEMP (ENO, HDATE) select EMPNO, HIREDATE from EMP where HIREDATE < ’31-DEC-60’;
1.4.2 Updates
For modifying attribute values of (some) tuples in a table, we use the update statement:
An expression consists of either a constant (new value), an arithmetic or string operation, or an SQL query. Note that the new value to assign to <column i> must a the matching data type.
An update statement without a where clause results in changing respective attributes of all tuples in the specified table. Typically, however, only a (small) portion of the table requires an update.
Examples: • The employee JONES is transfered to the department 20 as a manager and his salary is increased by 1000:
update EMP set JOB = ’MANAGER’, DEPTNO = 20, SAL = SAL +1000 where ENAME = ’JONES’; • All employees working in the departments 10 and 30 get a 15% salary increase. update EMP set SAL = SAL ∗ 1.15 where DEPTNO in (10,30); Analogous to the insert statement, other tables can be used to retrieve data that are used as new values. In such a case we have a <query> instead of an <expression>.
Example: All salesmen working in the department 20 get the same salary as the manager who has the lowest salary among all managers.
update EMP set SAL =(select min(SAL) from EMP where JOB = ’MANAGER’) where JOB = ’SALESMAN’ and DEPTNO = 20; Explanation: The query retrieves the minimum salary of all managers. This value then is assigned to all salesmen working in department 20.
10
It is also possible to specify a query that retrieves more than only one value (but still only one tuple!). In this case the set clause has the form set(<column i, ..., column j>)=<query>. It is important that the order of data types and values of the selected row exactly correspond to the list of columns in the set clause.
1.4.3 Deletions
All or selected tuples can be deleted from a table using the delete command:
delete from <table> [where <condition>];
If the where clause is omitted, all tuples are deleted from the table. An alternative command for deleting all tuples from a table is the truncate table <table> command. However, in this case, the deletions cannot be undone (see subsequent Section 1.4.4).
Example: Delete all projects (tuples) that have been finished before the actual date (system date):
delete from PROJECT where PEND < sysdate;
sysdate is a function in SQL that returns the system date. Another important SQL function is user, which returns the name of the user logged into the current Oracle session.
1.4.4 Commit and Rollback
A sequence of database modifications, i.e., a sequence of insert, update, anddelete state- ments, is called a transaction. Modifications of tuples are temporarily stored in the database system. They become permanent only after the statement commit; has been issued.
As long as the user has not issued the commit statement, it is possible to undo all modifications since the last commit. To undo modifications, one has to issue the statement rollback;.
It is advisable to complete each modification of the database with a commit (as long as the modification has the expected effect). Note that any data definition command such as create table results in an internal commit.Acommit is also implicitly executed when the user terminates an Oracle session.
1.5 Queries (Part II)
In Section 1.2 we have only focused on queries that refer to exactly one table. Furthermore, conditions in a where were restricted to simple comparisons. A major feature of relational databases, however, is to combine (join) tuples stored in different tables in order to display more meaningful and complete information. In SQL the select statement is used for this kind of queries joining relations:
The specification of table aliases in the from clause is necessary to refer to columns that have the same name in different tables. For example, the column DEPTNO occurs in both EMP and DEPT. If we want to refer to either of these columns in the where or select clause, a table alias has to be specified and put in the front of the column name. Instead of a table alias also the complete relation name can be put in front of the column such as DEPT.DEPTNO, but this sometimes can lead to rather lengthy query formulations.
1.5.1 Joining Relations
Comparisons in the where clause are used to combine rows from the tables listed in the from clause.
Example: In the table EMP only the numbers of the departments are stored, not their name. For each salesman, we now want to retrieve the name as well as the number and the name of the department where he is working:
select ENAME, E.DEPTNO, DNAME from EMP E, DEPT D where E.DEPTNO = D.DEPTNO and JOB = ’SALESMAN’;
Explanation: E and D are table aliases for EMP and DEPT, respectively. The computation of the query result occurs in the following manner (without optimization): 1. Each row from the table EMP is combined with each row from the table DEPT (this oper- ation is called Cartesian product). If EMP contains m rows and DEPT contains n rows, we thus get n∗m rows. 2. From these rows those that have the same department number are selected (where E.DEPTNO = D.DEPTNO). 3. From this result finally all rows are selected for which the condition JOB = ’SALESMAN’ holds.
In this example the joining condition for the two tables is based on the equality operator “=”. The columns compared by this operator are called join columns and the join operation is called an equijoin.
Any number of tables can be combined in a select statement.
Example: For each project, retrieve its name, the name of its manager, and the name of the department where the manager is working: select ENAME, DNAME, PNAME from EMP E, DEPT D, PROJECT P where E.EMPNO = P.MGR and D.DEPTNO = E.DEPTNO;
12
It is even possible to join a table with itself:
Example: List the names of all employees together with the name of their manager: select E1.ENAME, E2.ENAME from EMP E1, EMP E2 where E1.MGR = E2.EMPNO;
Explanation: The join columns are MGR for the table E1 and EMPNO for the table E2. The equijoin comparison is E1.MGR = E2.EMPNO.
1.5.2 Subqueries
Up to now we have only concentrated on simple comparison conditions in a where clause, i.e., we have compared a column with a constant or we have compared two columns. As we have already seen for the insert statement, queries can be used for assignments to columns. A query result can also be used in a condition of a where clause. In such a case the query is called a subquery and the complete select statement is called a nested query.
A respective condition in the where clause then can have one of the following forms: 1. Set-valued subqueries <expression> [not] in (<subquery>) <expression><comparison operator> [any|all](<subquery>) An <expression> can either be a column or a computed value. 2. Test for (non)existence [not] exists (<subquery>)
In a where clause conditions using subqueries can be combined arbitrarily by using the logical connectives and and or.
Example: List the name and salary of employees of the department 20 who are leading a project that started before December 31, 1990:
select ENAME, SAL from EMP where EMPNO in (select PMGR from PROJECT where PSTART < ’31-DEC-90’) and DEPTNO =20;
Explanation: The subquery retrieves the set of those employees who manage a project that started before December 31, 1990. If the employee working in department 20 is contained in this set (in operator), this tuple belongs to the query result set.
Example: List all employees who are working in a department located in BOSTON:
13
select ∗ from EMP where DEPTNO in (select DEPTNO from DEPT where LOC = ’BOSTON’);
The subquery retrieves only one value (the number of the department located in Boston). Thus it is possible to use “=” instead of in. As long as the result of a subquery is not known in advance, i.e., whether it is a single value or a set, it is advisable to use the in operator.
A subquery may use again a subquery in its where clause. Thus conditions can be nested arbitrarily. An important class of subqueries are those that refer to its surrounding (sub)query and the tables listed in the from clause, respectively. Such type of queries is called correlated subqueries.
Example: List all those employees who are working in the same department as their manager (note that components in [ ] are optional:
select ∗ from EMP E1 where DEPTNO in (select DEPTNO from EMP [E] where [E.]EMPNO = E1.MGR);
Explanation: The subquery in this example is related to its surrounding query since it refers to the column E1.MGR. A tuple is selected from the table EMP (E1) for the query result if the value for the column DEPTNO occurs in the set of values select in the subquery. One can think of the evaluation of this query as follows: For each tuple in the table E1, the subquery is evaluated individually. If the condition where DEPTNO in ...evaluates to true, this tuple is selected. Note that an alias for the table EMP in the subquery is not necessary since columns without a preceding alias listed there always refer to the innermost query and tables. Conditions of the form <expression><comparison operator> [any|all] <subquery> are used to compare a given <expression> with each value selected by <subquery>. • For the clause any, the condition evaluates to true if there exists at least on row selected by the subquery for which the comparison holds. If the subquery yields an empty result set, the condition is not satisfied. • For the clause all, in contrast, the condition evaluates to true if for all rows selected by the subquery the comparison holds. In this case the condition evaluates to true if the subquery does not yield any row or value.
Example: Retrieve all employees who are working in department 10 and who earn at least as much as any (i.e., at least one) employee working in department 30: select ∗ from EMP where SAL >= any (select SAL from EMP where DEPTNO = 30) and DEPTNO = 10;
14
Note: Also in this subquery no aliases are necessary since the columns refer to the innermost from clause.
Example: List all employees who are not working in department 30 and who earn more than all employees working in department 30:
select ∗ from EMP where SAL > all (select SAL from EMP where DEPTNO = 30) and DEPTNO <> 30;
For all and any, the following equivalences hold: in ⇔ = anynot in ⇔ <> all or != all Often a query result depends on whether certain rows do (not) exist in (other) tables. Such type of queries is formulated using the exists operator.
Example: List all departments that have no employees:
select ∗ from DEPT where not exists (select ∗ from EMP where DEPTNO = DEPT.DEPTNO);
Explanation: For each tuple from the table DEPT, the condition is checked whether there exists a tuple in the table EMP that has the same department number (DEPT.DEPTNO). In case no such tuple exists, the condition is satisfied for the tuple under consideration and it is selected. If there exists a corresponding tuple in the table EMP, the tuple is not selected.
1.5.3 Operations on Result Sets
Sometimes it is useful to combine query results from two or more queries into a single result. SQL supports three set operators which have the pattern: <query 1><set operator><query 2> The set operators are: • union [all] returns a table consisting of all rows either appearing in the result of <query 1> or in the result of <query 2>. Duplicates are automatically eliminated unless the clause all is used. • intersect returns all rows that appear in both results <query 1> and <query 2>. • minus returns those rows that appear in the result of <query 1> but not in the result of <query 2>.
15
Example: Assume that we have a table EMP2 that has the same structure and columns as the table EMP: • All employee numbers and names from both tables: select EMPNO, ENAME from EMP union select EMPNO, ENAME from EMP2; • Employees who are listed in both EMP and EMP2: select ∗ from EMP intersect select ∗ from EMP2; • Employees who are only listed in EMP: select ∗ from EMP minus select ∗ from EMP2; Each operator requires that both tables have the same data types for the columns to which the operator is applied.
1.5.4 Grouping
In Section 1.2.4 we have seen how aggregate functions can be used to compute a single value for a column. Often applications require grouping rows that have certain properties and then applying an aggregate function on one column for each group separately. For this, SQL pro- vides the clause group by <group column(s)>. This clause appears after the where clause and must refer to columns of tables listed in the from clause.
select <column(s)> from <table(s)> where <condition> group by <group column(s)> [having <group condition(s)>];
Those rows retrieved by the selected clause that have the same value(s) for <group column(s)> are grouped. Aggregations specified in the select clause are then applied to each group sepa- rately. It is important that only those columns that appear in the <group column(s)> clause can be listed without an aggregate function in the select clause !
Example: For each department, we want to retrieve the minimum and maximum salary.
select DEPTNO, min(SAL), max(SAL) from EMP group by DEPTNO;
Rows from the table EMP are grouped such that all rows in a group have the same department number. The aggregate functions are then applied to each such group. We thus get the following query result:
Rows to form a group can be restricted in the where clause. For example, if we add the condition where JOB = ’CLERK’, only respective rows build a group. The query then would retrieve the minimum and maximum salary of all clerks for each department. Note that is not allowed to specify any other column than DEPTNO without an aggregate function in the select clause since this is the only column listed in the group by clause (is it also easy to see that other columns would not make any sense).
Once groups have been formed, certain groups can be eliminated based on their properties, e.g., if a group contains less than three rows. This type of condition is specified using the having clause. As for the select clause also in a having clause only <group column(s)> and aggregations can be used.
Example: Retrieve the minimum and maximum salary of clerks for each department having more than three clerks. select DEPTNO, min(SAL), max(SAL) from EMP where JOB = ’CLERK’ group by DEPTNO having count(∗) > 3; Note that it is even possible to specify a subquery in a having clause. In the above query, for example, instead of the constant 3, a subquery can be specified.
A query containing a group by clause is processed in the following way: 1. Select all rows that satisfy the condition specified in the where clause. 2. From these rows form groups according to the group by clause. 3. Discard all groups that do not satisfy the condition in the having clause. 4. Apply aggregate functions to each group. 5. Retrieve values for the columns and aggregations listed in the select clause.
1.5.5 Some Comments on Tables
Accessing tables of other users
Provided that a user has the privilege to access tables of other users (see also Section 3), she/he can refer to these tables in her/his queries. Let <user> be a user in the Oracle system and <table> a table of this user. This table can be accessed by other (privileged) users using the command select ∗ from <user>.<table>;
17
In case that one often refers to tables of other users, it is useful to use a synonym instead of <user>.<table>. InOracle-SQL a synonym can be created using the command create synonym <name> for <user>.<table> ; It is then possible to use simply <name> in a from clause. Synonyms can also be created for one’s own tables.
Adding Comments to Definitions
For applications that include numerous tables, it is useful to add comments on table definitions or to add comments on columns. A comment on a table can be created using the command
comment on table <table> is ’<text>’;
A comment on a column can be created using the command
comment on column <table>.<column> is ’<text>’;
Comments on tables and columns are stored in the data dictionary. They can be accessed using the data dictionary views USER TAB COMMENTS and USER COL COMMENTS (see also Section 3).
Modifying Table- and Column Definitions
It is possible to modify the structure of a table (the relation schema) even if rows have already been inserted into this table. A column can be added using the alter table command
alter table <table> add(<column><data type> [default <value>][<column constraint>]);
If more than only one column should be added at one time, respective add clauses need to be separated by colons. A table constraint can be added to a table using
alter table <table> add (<table constraint>);
Note that a column constraint is a table constraint, too. not null and primary key constraints can only be added to a table if none of the specified columns contains a null value. Table definitions can be modified in an analogous way. This is useful, e.g., when the size of strings that can be stored needs to be increased. The syntax of the command for modifying a column is alter table <table> modify(<column> [<data type>][default <value>][<column constraint>]);
Note: In earlier versions of Oracle it is not possible to delete single columns from a table definition. A workaround is to create a temporary table and to copy respective columns and rows into this new table. Furthermore, it is not possible to rename tables or columns. In the most recent version (9i), using the alter table command, it is possible to rename a table, columns, and constraints. In this version, there also exists a drop column clause as part of the alter table statement.
Deleting a Table
A table and its rows can be deleted by issuing the command drop table <table> [cascade constraints];.
18
1.6 Views
In Oracle the SQL command to create a view (virtual table) has the form create [or replace] view <view-name> [(<column(s)>)] as <select-statement> [with check option [constraint <name>]];
The optional clause or replace re-creates the view if it already exists. <column(s)> names the columns of the view. If <column(s)> is not specified in the view definition, the columns of the view get the same names as the attributes listed in the select statement (if possible).
Example: The following view contains the name, job title and the annual salary of em- ployees working in the department 20: create view DEPT20 as select ENAME, JOB, SAL∗12 ANNUAL SALARY from EMP where DEPTNO = 20; In the select statement the column alias ANNUAL SALARY is specified for the expression SAL∗12 and this alias is taken by the view. An alternative formulation of the above view definition is create view DEPT20 (ENAME, JOB, ANNUAL SALARY) as select ENAME, JOB, SAL ∗ 12 from EMP where DEPTNO = 20;
A view can be used in the same way as a table, that is, rows can be retrieved from a view (also respective rows are not physically stored, but derived on basis of the select statement in the view definition), or rows can even be modified. A view is evaluated again each time it is accessed. In Oracle SQL no insert, update, ordelete modifications on views are allowed that use one of the following constructs in the view definition: • Joins • Aggregate function such as sum, min, max etc. • set-valued subqueries (in, any, all) or test for existence (exists) • group by clause or distinct clause In combination with the clause with check option any update or insertion of a row into the view is rejected if the new/modified row does not meet the view definition, i.e., these rows would not be selected based on the select statement. A with check option can be named using the constraint clause.
A view can be deleted using the command delete <view-name>.
TEN WhatsApp Tips And Tricks That You Should Know TODAY
1. Hide "Last Seen" Timestamp
By default, WhatsApp shows a "last seen" timestamp, telling other
users the last time you were on WhatsApp. Some of you may want to disable this timestamp, for privacy reasons. You can disable this timestamp on both iOS and Android.
If you’re an iOS user, you’re in luck, since all you need to do is go into Settings > Chat Settings > Advanced and set Last Seen Timestamp to Off.
If you’re an Android user, you won’t have access to this setting from
the app itself. Instead, you’re going to have to rely on a third party app such as Hide WhatsApp Status. The app disables your WiFi and data connection when you open WhatsApp.
Once you exit the app, your WiFi and data connections are reactivated, WhatsApp will sync, and your messages will be sent.
2. Backup And Restore WhatsApp Chats
WhatsApp makes automatic backups of your chats, but you can also make a manual backup. On iOS, it’s Settings > Chat Settings > Chat Backup, then tap Back Up Now.
On Android, just go into Settings > Chat settings and tap Backup conversations to create a backup. This won’t backup your media, so you’ll need to use a file manager to copy the media folders in /sdcard/WhatsApp/Media.
There’s no way to restore chats directly from WhatsApp, so if you want to restore a backup you’re going to have to uninstall and reinstall WhatsApp.
When you start WhatsApp after the reinstall, you should be prompted to
restore your most recent backup. Just follow the procedure and your
chats should all be back.
3. Lock Your WhatsApp
Everyone, at some point or another, has probably had to deal with
friends or family taking a sneak peek at their WhatsApp messages.
Thankfully, if you’re using WhatsApp on Android or BlackBerry, there are
apps that can help secure your WhatsApp from prying eyes.
If you’re using Android, there’s WhatsApp Lock, while BlackBerry users will want to check out Lock for WhatsApp.
Basically, both of these apps work similarly: when you use them, WhatsApp will be protected by a PIN (in the case of WhatsLock) or a password
(in the case of Lock for WhatsApp). Either way, once you have things
set up, the people around you shouldn’t be able to take a sneak peek at
your WhatsApp any longer.
4. Create Shortcuts For Important Contacts
Want to speed up your WhatsApp communication? How about creating a shortcut to your favorite Whatsapp contact or group straight from your homescreen?
On Android, this is as simple as long pressing on the group or
contact you want to create a shortcut for. When the menu pops up, just
tap on Add conversation shortcut. This will create a shortcut to the contact or group you have chosen right on your homescreen.
This behaviour isn’t available on WhatsApp for iOS, but you can use a third-party app such as 1TapWA to have similar functionality on your iPhone. Since it’s an app, 1TapWA also has some extra features such as an image editor and an action scheduler.
5. Stop WhatsApp Images from Appearing In Gallery Or Camera Roll
Having WhatsApp images in your Gallery or Camera Roll can be very
annoying; maybe the images are somewhat private, or you just don’t like
having these images clutter up your Gallery or Camera Roll. You can fix
this on both iOS and Android.
On iOS, it’s pretty simple; just go to Settings > Privacy > Photos and then turn the WhatsApp switch off.
On Android, you have to create a .nomedia file in WhatsApp’s images or video directories. To do this, you need a file explorer such as ES File Explorer. Navigate to the images or video folders. Tap the New button in the lower left, pick File and create a file named .nomedia. This will stop the Gallery from scanning the folder.
6. Change Your WhatsApp Phone Number
If you’ve changed phone numbers but kept the same phone, you don’t need to uninstall and reinstall
WhatsApp just to change numbers. There’s a setting within WhatsApp that
will let you migrate your WhatsApp account to a different phone number.
Go to Settings > Account > Change number. Enter your old phone number in the top field and then your new phone number in the bottom field. Then press Done. Verify your new phone number, and all your chat history, groups and so on will be migrated to the new number.
7. Install WhatsApp On An Android Tablet
WhatsApp is built for phones and is intelligent enough to know when
you’re trying to run it on a tablet, but there are ways around this.
Firstly, you need to grab the latest version of the
WhatsApp .apk. Visit the official site with Chrome or Firefox and
request the desktop version of the site, which will allow you to download the .apk directly.
Then download SRT AppGuard. Install both.
Run AppGuard first. Select WhatsApp from the Dashboard then press Monitor. Once AppGuard is done setting up the monitoring, scroll down and disable read phone status and identity under Phone calls.
WhatsApp should now run on your tablet. To activate WhatsApp, you can
just use your landline and have WhatsApp call you with the three-digit
verification code.
8. WhatsApp Chat Heads On Android
One of the best things about Facebook Messenger is its chat heads
functionality. We’ve talked about bringing chat heads features to SMS before, but now you can also have chat heads for your WhatsApp conversations too, using WhatsApp Chat Heads. As the name suggests, the app works alongside WhatsApp to add chat heads for your conversations.
The chat heads are somewhat customizable, and you can have specific
LED colors, notification sounds and chat head colors for each of your
contacts. One thing to be aware of, though, is that the app requires root access. Plus, it’s also still in beta, so you may encounter some small issues here and there.
9. Get Messaging Statistics On Android
This will definitely interest you if you’re a statistics geek, or
simply someone who’s interested in finding out you and your friends’
WhatsApp habits. WhatStat
provides information for metrics such as your top friends, friends’ and
groups’ most active times of the day as well as message distribution for both one-on-one and group chats.
WhatStat presents all this information in easy-to-understand visualisations
that will make perfect sense to anyone. No more having to pay specific
attention to who initiates conversations or what a good time to message
someone is; WhatStat will do that all for you.
10. Get WhatsApp notifications On Desktop
If you’ve ever missed a WhatsApp message while working on your
desktop, you’ll know how annoying it can be. If you’re using Android,
there are a few ways to make sure that you never miss a WhatsApp message again. You can use Pushbullet,
which includes notification mirroring alongside a lot of other
features, but if all you want is notifications on your computer, check
out Desktop Notifications.
Just install Desktop Notifications on your Android phone, then install either the Chrome or Firefox extensions depending on your choice of browser. Link the extension to the app using the code provided and you’re good to go; you’ll now get WhatsApp (and more) notifications on your desktop.
Add Micromax Yu Yureka Automatically in Add to Cart yureka add to cart plugin
On Previous Sale
many people got nothing in the sale as the pieces are low and peoples
are much therefore many returned from amazon unhappily so now they have a
second chance to grab their Yu Yureka as Amazon will conduct the 2nd
Flash Sale Of it on 22nd January Thursday at 2 PM
Make
Sure you are already subscribed to Yu Yureka's Page in order to enter
in the sale if not then visit the registration link and subscribe now : Click here
Method 2 :
Download Buyhatke addon for Google Chrome (Don't use Mozilla Firefox) - Click here
Goto the link and then Download the addon and let it install.
Like Us and Help to reach a new milestone :)
After The Installation goto Amazon's Homepage and Sign up or sign in to your account.
Make
Sure you are already subscribed to Yu Yureka's Page in order to enter
in the sale if not then visit the registration link and subscribe now : Click here Now
Amazon's Homepage will open and you can see a small popup of Buyhatke
addon in the bottom right corner of the browser. If the pop up does't
come then Click here
Now put a tick mark on the checkbox and click on "Save Settings".
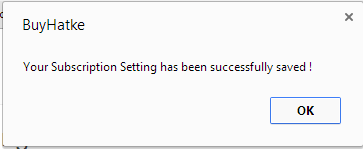
Now a popup will appear on the screen Click on "OK"
Now On 22nd January login to Amazon before 2 pm and visit this page : Click here (Product Page)